Tablet Screen Replacement: What to Do When Disaster Strikes
Tablets have become an essential part of our lives, used for work, entertainment, and communication. However, one familiar problem tablet users face is a cracked or broken screen. Fortunately, replacing a tablet screen can be done relatively quickly, provided you have the right tools and follow the correct procedure.
This tablet screen replacement guide aims to provide you with step-by-step instructions on how to replace a broken screen fast on your tablet:

Before You Begin
- Identify your tablet model: It is essential to identify the exact model of your tablet to ensure you purchase the correct replacement screen. The model number is on the back of your device or in the settings menu.
- Gather your tools: You'll typically need a screwdriver set, plastic opening tools, and adhesive strips. Depending on the complexity of the repair, a heat gun may also be helpful.
- Consider professional repair: Replacing a screen can be tricky, and if you're uncomfortable doing it yourself, iFixScreens or your device's manufacturer may offer repair services. These services come with a warranty on the repair and can ensure the job is done correctly to avoid further damage.
Reasons for Tablet Screen Damage: A Deeper Dive

Here's a breakdown of common culprits behind cracked or broken tablet screens:
The Notorious Drop:
This is the most common reason for screen damage. Tablets can slip out of our hands, fall off tables or desks, or get bumped by pets or children. A short fall onto a hard surface can cause cracks or shatter the screen.
Pressure Points:
Constant pressure can damage your screen while not as dramatic as a drop. This can happen from:
- Carrying your tablet in a bag: If your tablet is crammed in a tight space with other objects, pressure from keys, pens, or other items can cause cracks.
- Sitting on your tablet: We've all done it! Unfortunately, accidents happen, and sitting on your tablet can easily crack the screen.
- Twisting or bending: Tablets are not designed to bend, and forcefully twisting them can put undue stress on the screen, causing cracks or internal damage.
Water Damage:
Liquid spills or submersion can wreak havoc on your tablet's screen. Water can short out circuits and cause the touchscreen to malfunction or become unresponsive. Even small amounts of liquid can seep between the screen layers and cause permanent damage.
Manufacturing Defects:
In rare cases, defects in the manufacturing process may make the screen more susceptible to damage. This could be a weak spot in the glass, faulty adhesives, or even a malfunctioning digitizer (the touch-sensitive layer of the screen). If you suspect a manufacturing defect, warranty coverage may apply.
Everyday Wear and Tear:
Over time, with constant use, the screen's protective oleophobic coating (which helps repel fingerprints and smudges) can wear down. This can make the screen more susceptible to scratches from everyday use, like keys or coins in your bag.
Types of Tablet Screen Cracks: A Visual Guide
Here's a breakdown of common crack varieties to help you identify the damage on your device:
Minor Scratches:
These appear as faint lines or blemishes on the screen's surface and usually don't affect functionality. They're often caused by everyday wear and tear from objects like keys or dust particles. While they may not be a significant concern initially, scratches can accumulate and become more noticeable.
- Appearance: Fine lines or light surface blemishes, often barely visible.
- Touchscreen Functionality: Not affected.
- Repair: Not usually necessary. Consider a screen protector to prevent further scratches.
Spiderweb Cracks:
These radiate outward from a central impact point, resembling a spiderweb. A moderate force causes them and can sometimes appear even if the touchscreen remains functional. However, spiderweb cracks can quickly worsen with further pressure or drops.
- Appearance: Jagged cracks radiating from a central point, like a spiderweb.
- Touchscreen Functionality: This may be partially affected by touch registration issues near the cracks.
- Repair: Screen replacement is recommended to prevent further damage and restore full functionality.
Side-to-Side or Linear Cracks:
These run in a straight line across the screen, often from edge to edge. They're typically caused by a strong impact or pressure on the tablet's sides. These cracks can significantly impact usability and usually render the touchscreen unresponsive in affected areas.
- Appearance: A single, straight crack running across the screen.
- Touchscreen Functionality: Significantly affected, with entire screen sections potentially unresponsive.
- Repair: Screen replacement is necessary to restore functionality.
Shattered Screen:
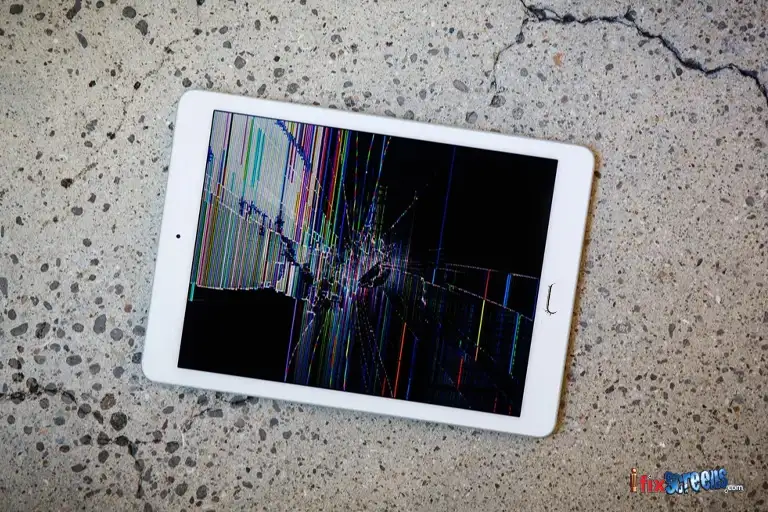
This is the most severe type of crack, with the screen broken into multiple pieces. A significant impact causes it and usually renders the tablet unusable. The shattered glass can also pose a cutting hazard.
- Appearance: The screen is completely broken into numerous large and small pieces.
- Touchscreen Functionality: Completely unresponsive.
- Repair: Screen replacement is necessary. Other internal components may also be affected depending on the damage's severity.
Additional Tips:
- The crack's size, depth, and location will all influence how much it affects functionality and the urgency of repair.
- Even minor cracks can compromise the water resistance of your tablet.
- If you're unsure about the type of crack or the extent of the damage, consult a professional repair service provider for an evaluation.
Preparing for the Replacement
Gather the necessary tools before the replacement process and prepare your workspace. We'll cover safety precautions and tips for a smooth repair. If you're uncomfortable doing a DIY repair, remember that iFixScreens locations are staffed by trained technicians who can fix your screen quickly and affordably.
Step-by-Step Guide for Replacement

Follow this detailed guide to replace your tablet screen effectively. We'll break it down into three key steps:
- Removing the old screen
- Installing the new one
- Testing your tablet to ensure a successful repair
Step 1: Gather Your Tools and Materials
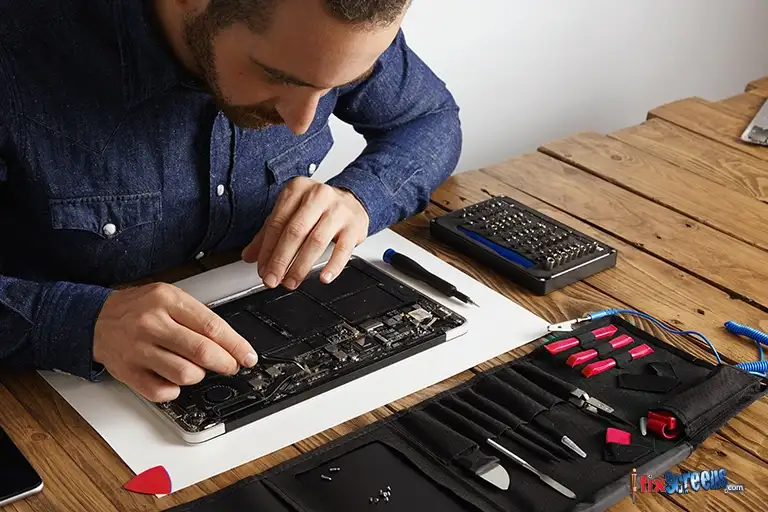
Before starting the repair, ensure you have all the necessary tools and materials. You'll typically need a screwdriver set, a heat gun or hairdryer (if required by your specific device), a replacement screen, adhesive, plastic prying tools, and a microfiber cloth.
Tools You'll Need:
- Screwdriver set
- Heat gun (optional)
- To ensure compatibility, a replacement screen can be purchased from a reputable parts supplier or directly from your device's manufacturer.
- Adhesive
- Plastic prying tools
- Microfiber cloth
Ensure you're working in a well-lit, clean, and dust-free area. A dust-free environment helps prevent dust particles from getting trapped between the new screen and the device, which can cause imperfections.
Step 2: Power Off Your Tablet
To prevent potential electrical hazards and ensure your safety, power off your tablet and disconnect it from any chargers or power sources immediately before beginning the repair process.
Step 3: Remove the Old Screen
- Use the appropriate prying tool to open the tablet's case carefully. Start at the edges and work your way around. Be gentle to avoid damaging the frame. If you're concerned about damaging the case, you can use a heat gun on low heat to soften the adhesive holding the case together.
- Once the case is open, locate and remove the screws securing the old screen. Keep track of these screws, as you'll need them later to ensure the new screen.
- Gently disconnect any cables or connectors holding the screen in place. If you're uncomfortable disassembling electronic devices, take pictures of how the cables are connected. This will help you ensure you reconnect everything correctly later.
- With the screen free from its connections, carefully lift it out of the tablet. Be cautious not to damage any cables or components.
Step 4: Prepare the New Screen
- Lay your tablet's old screen next to the replacement screen to ensure it matches the size and connectors. Double-checking compatibility helps avoid wasting time and money on a screen that won't work with your device.
- Follow the manufacturer's instructions to apply a thin layer of adhesive to the edges of the replacement screen. This will secure it in place. Be careful not to apply too much adhesive, as excess can seep into the device and damage components.
Step 5: Install the New Screen
- Lower the replacement screen into your tablet's frame, aligning the connectors with their corresponding slots. Double-check the alignment to avoid any issues with functionality later.
- If necessary, reconnect any cables or connectors you detached in Step 3, referring to your pictures or the manufacturer's instructions.
- Secure the new screen in place by reattaching the screws you removed earlier. Tighten the screws gently but firmly to ensure the screen is secure without cracking.
Step 6: Test Your Tablet
- Power on your tablet and check the newly installed screen. Ensure it responds to touch and displays correctly. Test your tablet's functions and features, such as the camera, speakers, and Wi-Fi, to confirm that the repair was successful.
- If you encounter any issues, such as the screen being unresponsive or flickering, a cable or connector may be loose. Carefully disassemble the tablet again and check all the connections. If you're still having trouble, you may want to consult a professional repair service provider like iFixScreens.
Step 7: Clean and Reassemble
- Use a microfiber cloth to clean any smudges or fingerprints from the new screen. Microfiber cloths are ideal for cleaning electronic devices because they are soft and lint-free, which helps prevent scratches.
- Carefully close your tablet's case and secure it with the screws.
- Power off your tablet one more time for a final safety check.
Final Thoughts

Ultimately, a broken tablet screen doesn't have to be a disaster. With patience, the right tools, and trust in our expert guidance, you can learn and restore your device to its former glory. Whether you're a tech enthusiast or a beginner, this guide will help.
However, if you don't feel comfortable doing a DIY repair, don't hesitate to contact a professional service provider. They can quickly diagnose the problem and get your tablet back in working order, often with a warranty on their repairs for added peace of mind.
Frequently Asked Question
Q. What are the most common causes of tablet screen damage?
A. Tablet screen damage can occur for various reasons, such as accidental drops, impacts, pressure on the screen, or exposure to extreme temperatures. Even a tiny crack or scratch can worsen over time and lead to the need for a screen replacement.
Q. How do I know if my tablet screen needs replacement?
A. If your tablet screen has a noticeable crack, shattered glass, unresponsive touch functionality, or display anomalies such as lines or discoloration, it likely needs a replacement. It's advisable to consult a tech expert for an accurate assessment.
Q. Can I repair a cracked tablet screen on my own?
A. While it's technically possible to DIY a tablet screen repair, it's a complex process that requires specialized tools and expertise. Without proper knowledge, you risk causing further damage to your device. It's recommended that you seek professional help for screen replacement.
Q. How much does it cost to replace a tablet screen?
A. The cost of replacing a tablet screen varies depending on the tablet's make and model and the extent of the damage. To find a competitive price, it's advisable to obtain quotes from different repair services.
Q. Where can I get a replacement screen for my tablet?
A. Tablet replacement screens can be purchased from authorized dealers, online retailers, or manufacturers. Choose a high-quality replacement screen compatible with your specific tablet model.
Q. What are the steps involved in replacing a tablet screen?
A. Replacing a tablet screen typically involves removing the old screen, disconnecting internal components, installing the new screen, and reassembling the device. This delicate process requires precision and care to avoid further damage.
Q. How long does it take to replace a tablet screen?
A. The time taken to replace a tablet screen can vary depending on the complexity of the repair and the availability of replacement parts. Sometimes, it can be done within a few hours, while more extensive repairs may take a day or two.