Root Galaxy Note 3
iFixScreens will show you the step-by-step instructions, to root your AT&T/Verizon Galaxy Note 3 on Android 4.4.2. This root works on Samsung Galaxy Note 3 models that are running on Android 4.4.2 with build numbers ending in NC4 or NC2. Please make sure you back up your device and remember that rooting your device may VOID your warranty, so please proceed with caution and at your OWN RISK. 
Step 1: Before starting this process, make sure you have Android 4.4.2. To check go to Settings->General->About and look under Android version.
Step 2: Turn on USB debugging under developer options.
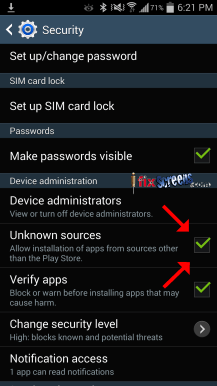
Step 3: Enable downloads from unknown sources. Do this by going into Settings->General->Security and check the box for unknown sources

Step 4: Open up the browser on the Note 3 and go to Towelroot.com, once on the page tap on the Lamda Icon.

Step 5: after download pen the Towelroot application.


Step 6: If you see a Google warning it "Accept"
Step 7: If you come across a warning that says, "installing this app may harm your device", just check "I understand that this app may be dangerous" and hit "Install". This app does not have any kind of spyware or dangerous content; root aps are flagged by Google's Play store.
Step 8: Hit "open" on the bottom of the screen, this will start the Towelroot application.
Step 9: Tap on "make it ra1n" to begin the rooting process. This entire process should take about 15 seconds.

Step 10: Make sure your Note 3 reboots after about 15 seconds. If it does not then tap on "make it ra1n" again. If you get an error, just tap on "OK" and that will reboot your phone.
Step 11: Once your Note 3 is rebooted, download Superuser.apk (by clicking)
Step 12: Once again you will have to enable downloads from unknown sources. Do this by going into Settings->General->Security and check the box for unknown sources
Step 13: Open the application with the My Files application on your Note 3 and tap "install". This will allow you to install the SuperSU application.
Step 14: Tap "Open" to start SuperSU.
Step 15: Tap "Continue".
Step 16: Tap "Normal".
Step 17: You may see a message to disable or remove KNOX. If you do see that message MAKE SURE you tap "OK". KNOX is a security feature that is not needed and it will interfere with the root. So Please make sure you remove this!!!
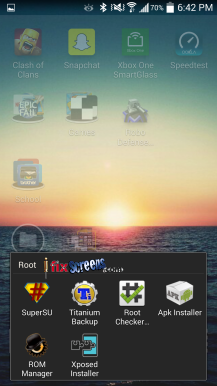
Step 18: Once everything is done installing, try to download and open a rooted application such as Root Checker or Titanium Backup.


Step 19: You have now rooted your Samsung Galaxy Note 3! Congratulations!!
If you need more help or questions come visit us at any of the following locations. Don't forget, if you need a screen repair come down and let the iFixScreens team assist you. If you break it, we can repair it! Our Mail-in address is also available to be as convenient to you as possible.