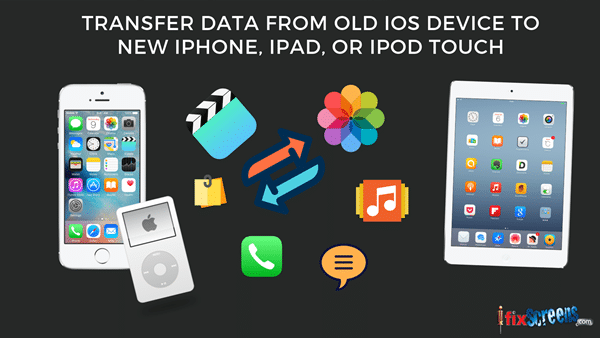
Transfer Data From Old IOS Device To New iPhone, iPad, iPod
The demand for electronic gadgetshas increased a lot, similarly, the demand for the iOS device has also increased. It has been developed by Apple Inc. This mobile phone is based on the Mac operating system. As such iPhone has a large storage capacity and due for this reason iPhone users can easily store any data in it such as audio/video songs, contacts, messages, and many more things.
When a new series of iPhonesis released the user shifts from the older version to the newer version and in this situation user wants to transfer the stored data from the old iPhone to the new iPhone. For this, it is important to keep the backup of iPhone data in your system and for this, you can use a third-party software known as iPhone backup software.
Before You Start Data Transfer:
• If you have an Apple Watch and you have purchased a new iPhone, first unpair your Apple Watch from your old iPhone before you set up your new device. • Ensure that you have a backup of your iOS device. • Get your Apple ID and password ready. • Transfer your SIM card. If your new device needs a different SIM card than what you have or an eSIM, contact your carrier.
Here Are The 3 Ways To Transfer Data From The Old iOS Device To The New:
1. How to transfer data from two iOS devices?
• Turn on your new device and place it near your old device running iOS 11 or later version. The Start screen seems on your present device and offers the option to use your Apple ID to set up your new device. Ensure that add Apple ID which you want to use, and then click Continue. • You must check that Bluetooth is turned on. • Wait for pictures to appear on your new device. Scan your current device over the new device, then center the picture in the viewfinder. Wait for a message which shows Finish on New device. • If you can’t access your old iOS device’s camera, tap Authenticate Manually, then follow the steps that appear. • When prompted, enter your present device’s passcode on the device that you’re setting up. • Follow the steps to set up Face ID or Touch ID on your new device. • After the process has been done, enter your Apple ID password on your new device. If you have more than one iOS device, you might also need to enter their passcodes. • Your new device will give suggestions for the choice of restoring apps, data, and settings from your most recent iCloud backup or updating your current device’s backup and then restoring. After you choose a backup, you can choose whether to transfer some settings related to location, privacy, Apple Pay, and Siri. • If you want to update the backup on your device, make sure that Wi-Fi is enabled on your device.
2. Use iTunes To Transfer Data To A New iOS Device:
• Turn on the newer iOS device, and proceed through setup until you’re asked on the Apps & Data screen how you want to set up the device. • Choose Restore from iTunes Backup. • Connect the iPhone or iPad over USB to the computer or laptop on which you performed an iTunes backup. • Click Restore Backup. • Choose the backup you just made. • Complete the remaining steps until the restore is complete.
3. Use An iCloud To Transfer Data To A New iOS Device:
• First, sign out of all of your accounts and unpair any devices from your first phone (the one you’re transferring the data from), such as your Apple Watch. • Make sure that the old iPhone is also connected to a solid WiFi network. • On your iPhone, go to Settings > The Name on Your Account> iCloud > iCloud Backup. • Your iOS device will now attempt to back itself up to iCloud. Wait for the old iPhone to finish the backup. • Turn on the second iPhone. Assuming, it’s new, it should have an introductory Hello screen. • Tap the Home button and follow the instructions shown on the screen until you are asked to join a WiFi network. Join your network, and then continue following the instructions. • When you reach the Apps & Data screen, See where it says Restore From iCloud Backup. Tap that, and then click Next. • You will be asked to sign in. Do so with your Apple ID and password. • From the list, choose which backup you want to transfer. • Now, wait until the backup is restored. After completed, you can continue your setup normally by following the instructions on the screen.
Ravi is the head of Content Strategy at iFixScreens Corporate. With over a decade of experience writing technical content for his readers, Ravi has helped thousands of readers with helpful content, tips, and tricks. He mainly writes content related to gadget repairs, such as iPhones, Smartphones, tablets, and laptops.
Please log in again.
The login page will open in a new tab. After logging in you can close it and return to this page.
This website or its third-party tools process personal data. In case of sale of your personal information, you may opt out by using the link Do not sell my personal information.
This ssss website uses cookies to improve your experience while you navigate through the website. Out of these, the cookies that are categorized as necessary are stored on your browser as they are essential for the working of basic functionalities of the website. We also use third-party cookies that help us analyze and understand how you use this website. These cookies will be stored in your browser only with your consent. You also have the option to opt-out of these cookies. But opting out of some of these cookies may affect your browsing experience.
Necessary cookies are absolutely essential for the website to function properly. These cookies ensure basic functionalities and security features of the website, anonymously.
Cookie
Duration
Description
cookielawinfo-checkbox-analytics
30 days
This cookie is set by GDPR Cookie Consent plugin. The cookie is used to store the user consent for the cookies in the category "Analytics".
cookielawinfo-checkbox-functional
30 days
The cookie is set by GDPR cookie consent to record the user consent for the cookies in the category "Functional".
cookielawinfo-checkbox-necessary
30 days
This cookie is set by GDPR Cookie Consent plugin. The cookies is used to store the user consent for the cookies in the category "Necessary".
cookielawinfo-checkbox-others
30 days
This cookie is set by GDPR Cookie Consent plugin. The cookie is used to store the user consent for the cookies in the category "Other.
cookielawinfo-checkbox-performance
30 days
This cookie is set by GDPR Cookie Consent plugin. The cookie is used to store the user consent for the cookies in the category "Performance".
viewed_cookie_policy
30 days
The cookie is set by the GDPR Cookie Consent plugin and is used to store whether or not user has consented to the use of cookies. It does not store any personal data.
Functional cookies help to perform certain functionalities like sharing the content of the website on social media platforms, collect feedbacks, and other third-party features.
Performance cookies are used to understand and analyze the key performance indexes of the website which helps in delivering a better user experience for the visitors.
Analytical cookies are used to understand how visitors interact with the website. These cookies help provide information on metrics the number of visitors, bounce rate, traffic source, etc.
Advertisement cookies are used to provide visitors with relevant ads and marketing campaigns. These cookies track visitors across websites and collect information to provide customized ads.